Mobile Deployment
General
Before you create a new release for either Android or iOS you need increment the version number for the app in the config.xml:
<?xml version='1.0' encoding='utf-8'?>
<widget id="com.therefugeecenter.findhello" version="1.1.7" xmlns="http://www.w3.org/ns/widgets" xmlns:android="http://schemas.android.com/apk/res/android" xmlns:cdv="http://cordova.apache.org/ns/1.0">
...
(It's the widget version - here it's at 1.1.7 - don't mix it up with the XML version)
and also in package.json:
{
  "name": "find-hello",
  "version": "1.1.7",
  ...
This version number is used by the Google Play Console and App Store Connect to create build numbers that have to be unique when they are uploaded.
Android
This has changed recently, moving from building, signing and zipping
.apkfiles to generating.aabfiles instead. This is due to the Google Play Console requirement of using API >= 30 as well as an upgrade ofcordova-androidto version >= 10.
Creating a production-ready build for Android is easily done with:
ionic cordova build android --prod --release
or to blow up the whole thing:
rm -rf www node_modules platforms && npm install && ionic cordova platform add android && ionic cordova build android --prod --release
This creates an .aab (Android App Bundle):
./platforms/android/app/build/outputs/bundle/release/app-release.aab
This .aab format is used for the Google Play Console and is ready for upload.
An Android App Bundle is a publishing format that includes all your app’s compiled code and resources, and defers APK generation and signing to Google Play.
Read more here:
- https://ionicframework.com/blog/google-play-android-app-bundle-requirement-for-new-apps/
This means that you shouldn't need to do anything else for getting the build onto the Google Play Store.
Signing
For some reason, we still need to sign the .aab file (or there's be an error uploading to Google Play Console). So run:
jarsigner -verbose -sigalg SHA1withRSA -digestalg SHA1 -keystore ~/.android/find-hello-keystore/find-hello-key.keystore -signedjar platforms/android/app/build/outputs/bundle/release/app-release-signed.aab platforms/android/app/build/outputs/bundle/release/app-release.aab uploadKey
Then upload to the Play Console.
Getting an APK
If you want to test the production build, you have to do a few things to get from the .aab back to a regular .apk file
brew install bundletool
bundletool build-apks --bundle=./platforms/android/app/build/outputs/bundle/release/app-release.aab --output=./platforms/android/app/build/outputs/bundle/release/app-release.apks --mode=universal --ks=~/.android/find-hello-keystore/find-hello-key.keystore --ks-key-alias=uploadKey \
Finally:
unzip -p ./platforms/android/app/build/outputs/bundle/release/app-release.apks universal.apk > ./platforms/android/app/build/outputs/bundle/release/app-release.apk
iOS
Connect to Xcode
Within XCode, you need to sign in to your developer account via Preferences > Account and selecting "Apple ID".
Create signing certs
Once added, you should choose "The Refugee Center Online" from Team and click "Manage Certificates ...".
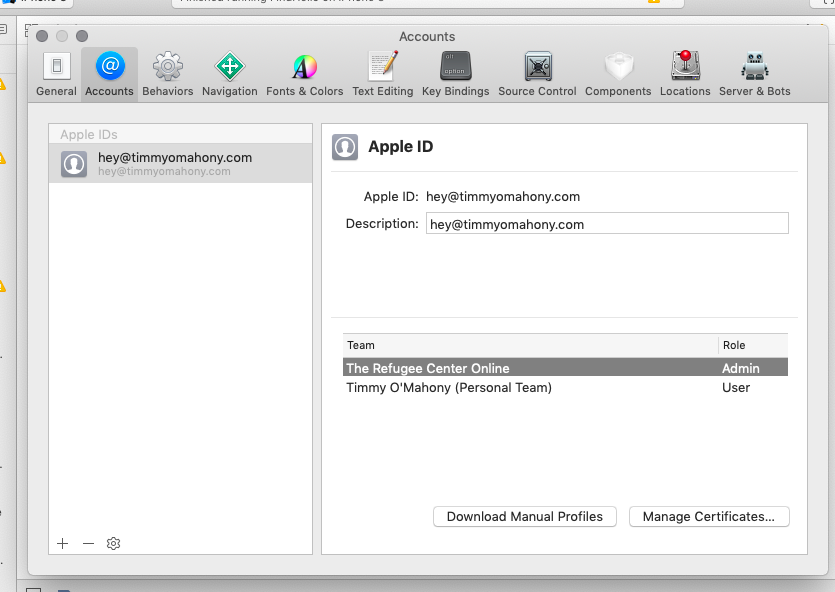
There are two families of certs: one family for iOS/WatchOS/TVOS and another for MacOS. Within each family, there are two types of signing certs: development and distribution. The former is per-developer (and therefore per machine) and latter is per-team (again, there can be only one per team)
For the development certification you can create it here in the "Manage Certificates" box by hitting the "+" in the bottom left and clicking "iOS Development".
The team distribution certificate is already be created.
Select old build system
Go to "File > Project Settings" and make sure "Build System" is set to "Legacy Build System"
Building the app
ionic cordova build ios --prod --release
Now open the Xcode project in ./platforms/ios/FindHello.xcodeproj
Configure the project
You'll need to configure the project the first time you build. Go to the general setting in the project nativator and make sure you've selected the correct team ("The Refugee Center Online")
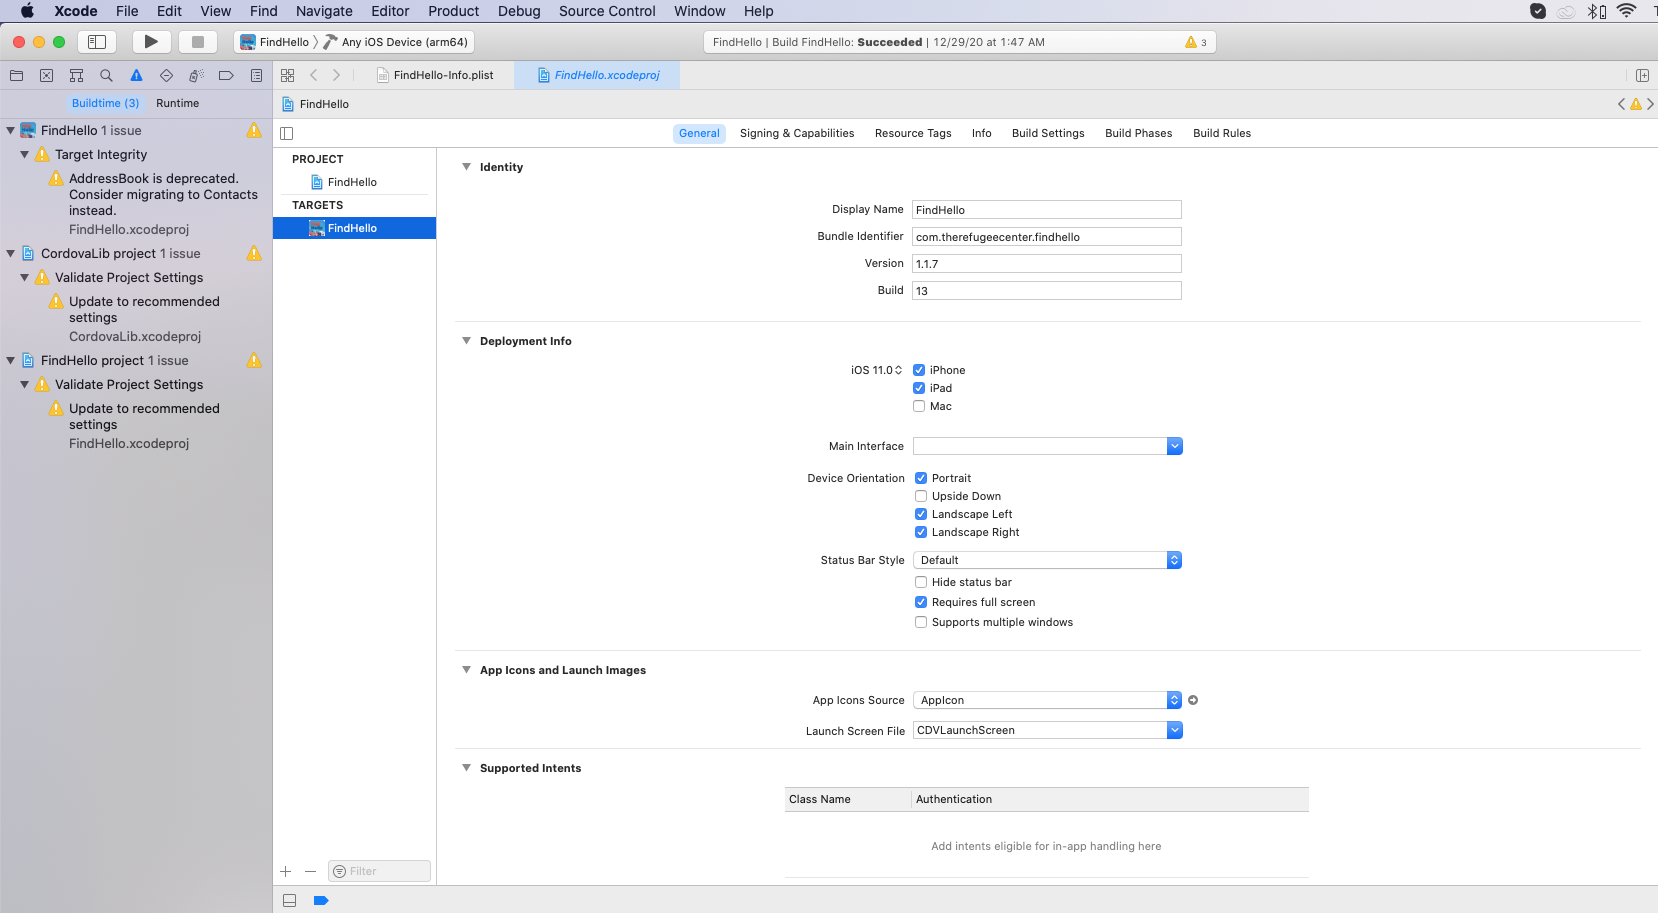
Then select "Generic iOS device" from the build destination dropdown:

Go to "Product > Scheme > Edit Scheme" in the toolbar. Select "run" from the sidebar and make sure "Build Configuration" is set to "Release".
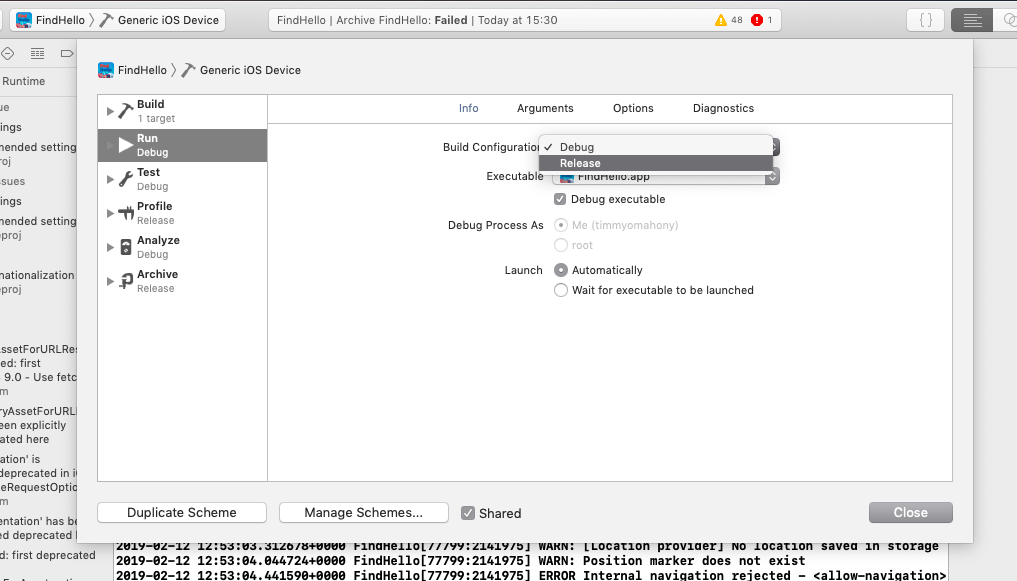
Then select "Archive" from the sidebar and do the same.
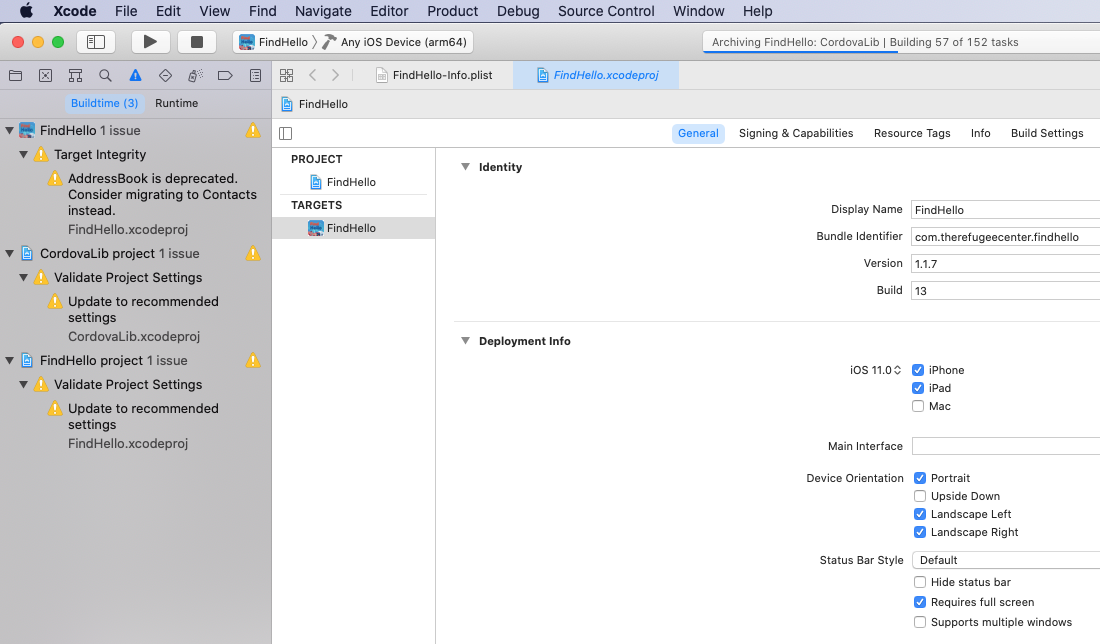
Now you should be able to create an archive by running "Product > Archive" from the toolbar:
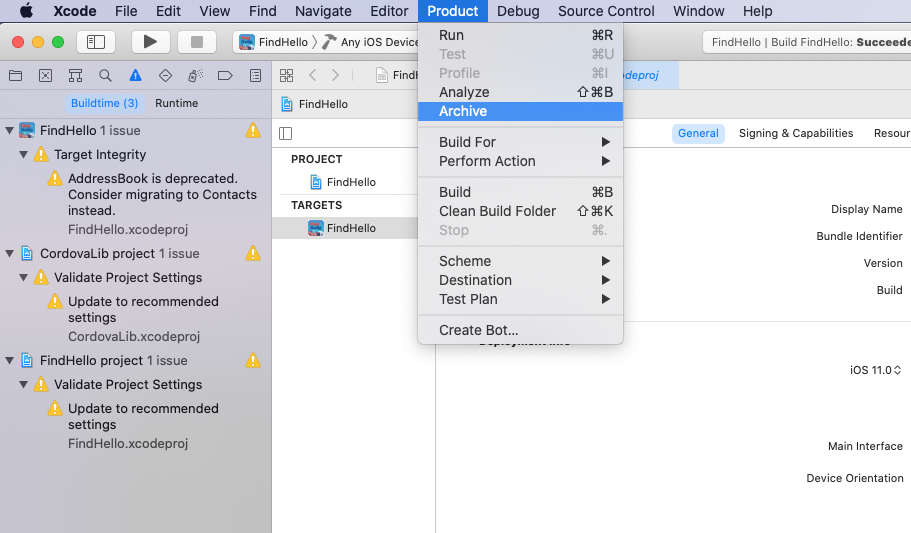
Troubleshooting: Error with conflicting provisioning settings
If the build fails and says you have issues with conflicting provisioning, check out this Stackoverflow answer
You need to go back to the "Signing & Capabilities", deselect "Automatic manage signings" and then reselect the team "The Refugee Center"
Troubleshooting: Error in Xcode build
If you are using Xcode to run the app on an emulator or device, you might get the build error that includes:
Firebase.h file not found.
This seems to be due to the cordova-firebase-plugin that require Cocoapods to install dependences. To fix this, you need to make sure you open the FindHello.xcworkspace file with the open command:
open ./platforms/ios/FindHello.xcworkspace
This is so that the correct Cocoapods headers (installed via Ruby) are on the path when Xcode loads
Issue Building Android Target SDK 30
If you see the following when uploading to the Google Store:
Your app currently targets API level 28 and must target at least API level 30 to ensure that it is built on the latest APIs optimised for security and performance.
To fix, first install these plugins:
cordova plugin add cordova-plugin-androidx-adapter
cordova plugin add cordova-plugin-androidx
Create a file build-extras.gradle in the root of the project:
android {
    defaultConfig {
    multiDexEnabled true
    }
}

dependencies {
    compile 'androidx.multidex:multidex:2.0.1'
}
Update the config.xml:
<preference name="android-targetSdkVersion" value="30" />
...
<platform name="android">
    <resource-file src="build-extras.gradle" target="app/build-extras.gradle" />
Now build again:
ionic build android --prod --release
Distribute the archive
If the archive builds correctly, you'll see the following screen:
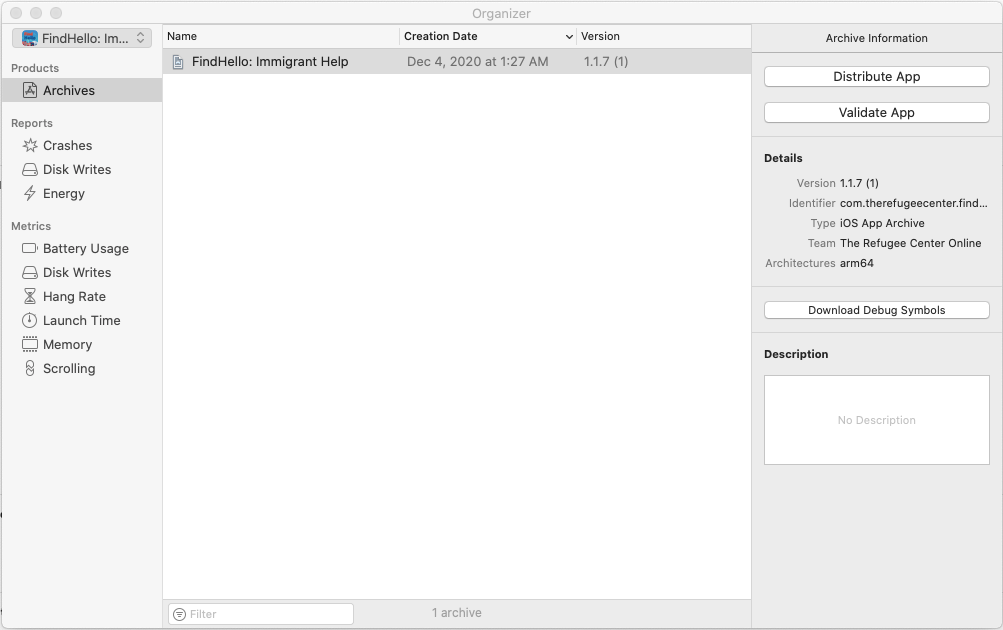
From there, click "Distribute App" followed by "iOS App Store" and then "Upload" as the destination. Keep the "Upload you app's symbols to receive ..." option on the next page. Keep "Automatically manage signing" selected on the next page.
The new release should now be published to the App Store Connect.